
Foraging for Hay

Many who try to find and live their own private wild on a farm, but never grew up in the country, may be shocked when they figure out how much it costs to set up said farm. Debt is not wild and I were to offer advice to any new or aspiring farmer it would be to not get into debt or get into as little debt as possible, except maybe a mortgage that you can afford to pay before any farm income is factored in.
Tractors are a farm item that many people feel they can’t live without, but tractors often come with debt. Horse farming is often advertised as an alternative to expensive tractors but as someone who initially set up her farm for horsepower and who is well familiar with the cost of owning horses, I will say firmly that they are not less expensive, they just don’t use gas.
Mossygoat Farm is run entirely with the cheapest tractor with a front loader and a backhoe that we could buy at the time, a John Deere 1025R. The salesperson literally guffawed at us when we mentioned both that tractor and horse farming because real farmers buy real tractors (you know, the ones that require a farmer to go $200,000 or more in debt setting the farmer up to having to farm to pay for debt).
The problem with a small tractor is that it lacks the horsepower (pun intended) to run a small baler. Or maybe the industry hasn’t come up with a baler that can be run with a small tractor. Also, balers are expensive! The consumer market is slowly catching up to the reality of small farmers and walk behind balers are becoming more available. I dream of this. But in the meantime, we store our hay loose, something that has been done for millennia and is still done in many parts of the world.
This week I saw an Instagram reel about someone who cut green grass, bunched it up, tied it up, and called it hay. This is not how you make hay and a person who does that is setting themselves up for sick or dead animals. It’s time that I republish an article I wrote in 2023 in hopes that any aspiring homesteading or small farm hay makers will see the proper process, and not what is outlined by hustling homesteaders trying to make quick buck off of video content.
Foraging for Hay
We have a little secret to share with you today. The secret is that you can fill your hay barn without buying $50,000+ of specialized equipment to bale hay. In fact, all you need is grass, a little ingenuity, and ability to perform some labor intensive but very satisfying work. Hay is dried cut grass. It really is that simple and with hay prices being at an all-time high, foraging for hay may be a viable economic solution for many small-scale farmers and homesteaders on a tight budget.

Mossygoat Farm has a hay backstory. We were fortunate to purchase our wildstead in 2015. That summer we were cutting grass in the fields and leaving it on the ground, and at the same time buying baled hay for our critters. This continued for too many years to admit. Even a seasoned forager sometimes takes a while to figure it out. On day one, we knew that we had acres of hay, but we never connected the dots on how to get our field’s bounty into our hay barn without a big tractor and implements. Years into life on our wildstead, the “aha moment” had finally arrived, we connected the dots and came up with a hay foraging plan.
Our push mower was a mulcher model, so we knew that would give us clippings and not hay. When push comes to shove, dried mulch mower clippings are still hay. We gave our riding mower a go at it on the field grasses. The results were mixed, but the riding mower worked for cutting hay. At Mossygoat Farm we also are very fortunate to have a subcompact tractor (John Deere 1025R) with a brush hog attachment, and we gave that a go. Both a brush hog and a riding mower will cut grass into smaller segments than using haying equipment or cutting by hand. The length of the cut grasses is still very acceptable as livestock hay. In fact, senior horses with poor teeth may actually appreciate the shorter length because it is less to chew.
Hay Foraging Steps
Turning dry grass to stored hay is pretty straightforward. This is how we forage hay at Mossygoat Farm:
Day one: Cut hay.
Day two: Flip hay. Check moisture, this step may also extend to day three.
Day three: Harvest hay. Again, check moisture after any morning dew has evaporated.
Day four: Store hay. Good day to start the process all over again.
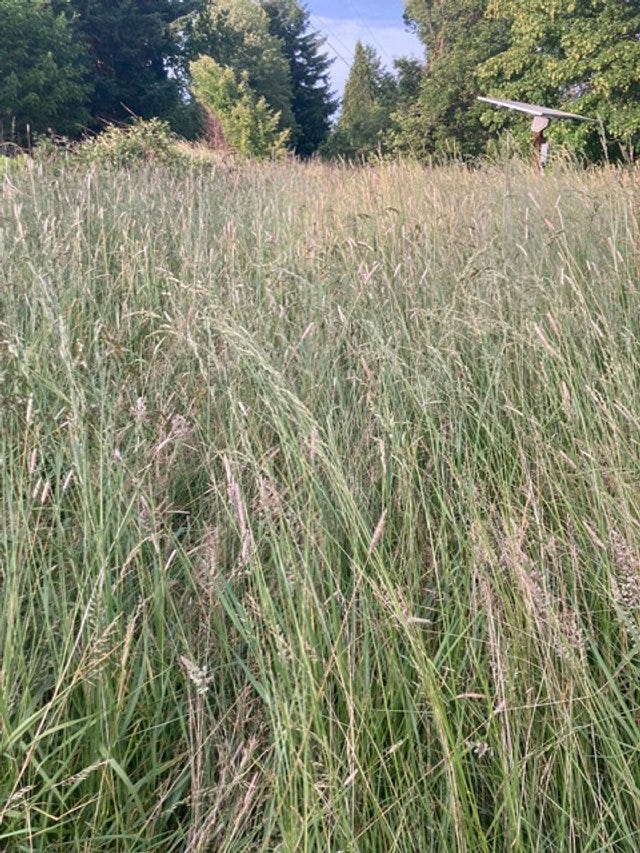
Before you forage for hay, make sure that the grass you plan on cutting is safe for animals. While the grass cut for hay does not have to be completely weed free, it does have to free of all poisonous plants. Walk the fields to become familiar with the different species of plants growing amongst the grasses. Lawns are a great hay resource as well but only harvest lawns that use no chemicals and familiarize yourself with the endophytes that could be present in lawn grass on the fescue. Pregnant mares especially cannot eat endophytes without risking severe pregnancy complications.
Hay is cut anytime from Spring to Fall. The grass height should be 15-18” minimum before you cut. and you need a week of dry weather over 70 degrees. Wetter climates or areas with irrigation will get more cuttings than dry areas. If a field is particularly wet, wait for it to fully dry out before cutting. There are parts of our fields that we do use a riding lawnmower for, set at 4” height, but use the tractor/ brush hog for the bulk of the hay cutting.
A common practice in many areas of the Western United States is to only cut hay once a year. If you plan on one cutting, to maximize the amount of both hay and nutrition, plan to cut after the seed head has formed but before the hay is dried out. Foraging for hay after the grass is dry for the year is still acceptable but the hay will have lower protein and nutrients. Low protein hay can still be fed to all livestock, but supplements and lick tubs should be used in conjunction.
If you are unsure when to first cut hay, pay attention to when your local hay farmers cut. Even if the process of foraging for hay is slightly different, the timing is usually the same.
Day One: Cut Hay
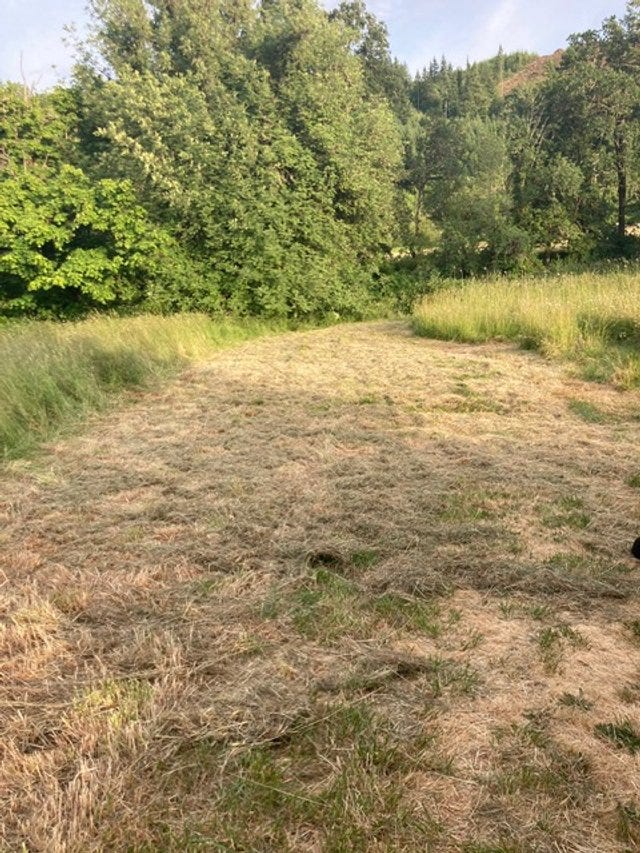
The first step in foraging for hay is to cut the grass. If you don’t have a tractor for this, you can use a sickle, scythe, or a riding lawnmower with no bag attachment. Push mowers tend to mulch the grass. Also think about the prevailing winds for your cutting path. You want the wind to be your ally when flipping your hay.
If you use a riding lawnmower with a side discharge, then you need to make sure that the cut grass is being dried on a cut area and not on long, uncut grass. The dew and moisture on uncut grass will not allow the cut grass to dry and it may possibly mold. Foraging hay is work, strategize your mower cutting and minimize your labor where you can.
When cutting, flipping, and gathering acres of hay, focus on small areas and not the whole field. Cut the area of grass that you can realistically manage to rake and gather in a day. The possibility of rain is always a consideration for anyone who cuts their hay. The hand foraging method, as described, has some time consuming and labor-intensive steps to keep in mind.
Day Two: Flip Hay
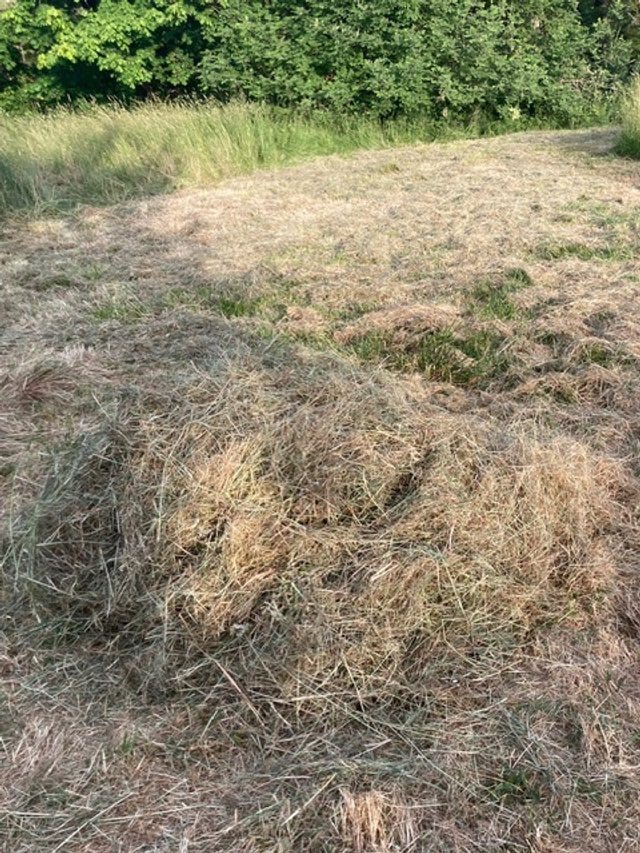
The cut grass exposed to the sun will dry quickly in warm weather, but the side facing the ground will be slower to dry and be exposed to the dew. On day two of hay making, flip the hay so that the ground side faces up. Again, nothing fancy is needed except hard but satisfying work. Although you can purchase a specialized rake for this, a classic leaf rake works fantastic. Go along your cut rows and flip the hay over with your rake. Trust your instincts here. Assess moisture, you may want to flip again and allow hay to dry for about another day. At Mossygoat Farm our foraged hay is not baled. If you own or build a manual baler, a moisture meter is highly recommended for testing your hay prior to harvesting.
Day Three: Harvest Hay
Now it’s time to gather your hay for storage. Before you do so, make sure that it is ready. Allow the morning dew to dry before this process. Pick a handful of hay up and twist or bend the stalks. If it is dry and crisp, it is ready. If the hay easily bends or seems wet, then flip it again and let it dry another day or two until it is crisp. Be cognizant that some areas may be wetter or drier than others.
Do not gather and store wet hay as it will mold and may potentially cause your hay pile to spontaneously combust. The same is true with baling wet hay. Loose hay has more of a latitude with the moisture levels because more air circulates around loose hay than it does baled hay, however, moisture content is still of utmost importance.
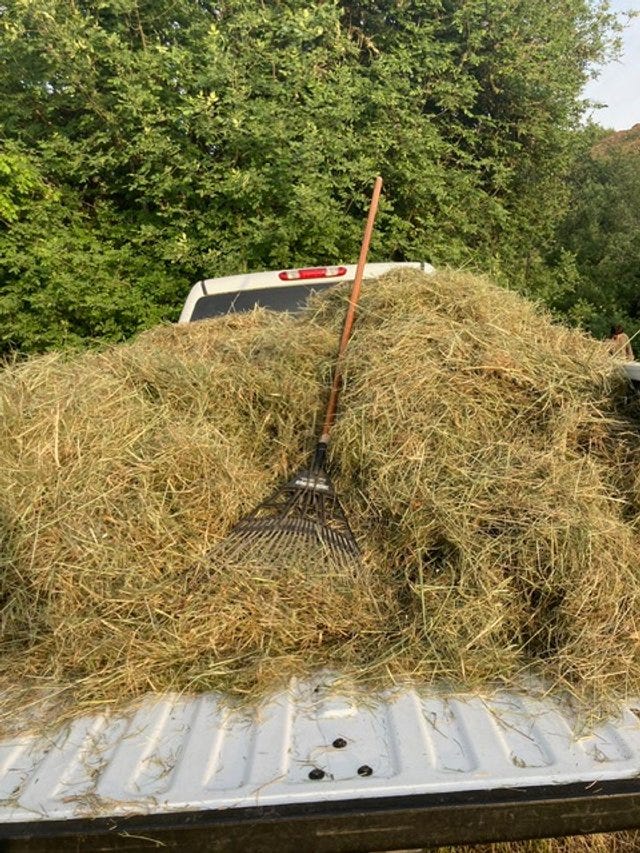
Use what you have to transport your hay to the barn. Load your truck, trailer, or tarp and move hay from the field to the barn. Look around and pick the most economical (both time and dollars) solution for you. Space permitting, your hay, when brought to the barn should be spread out to a degree to guarantee only dry hay is stored.
Day Four: Storing Loose Hay
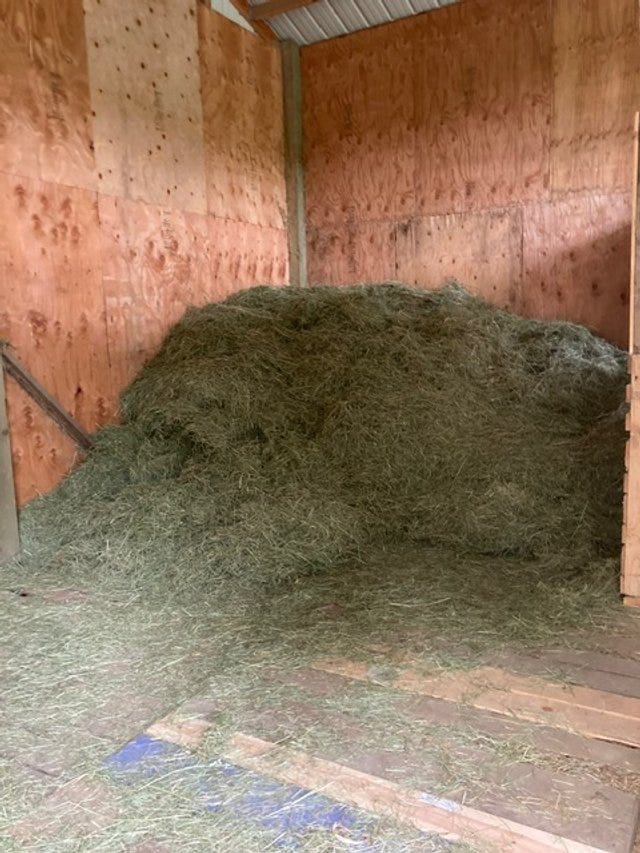
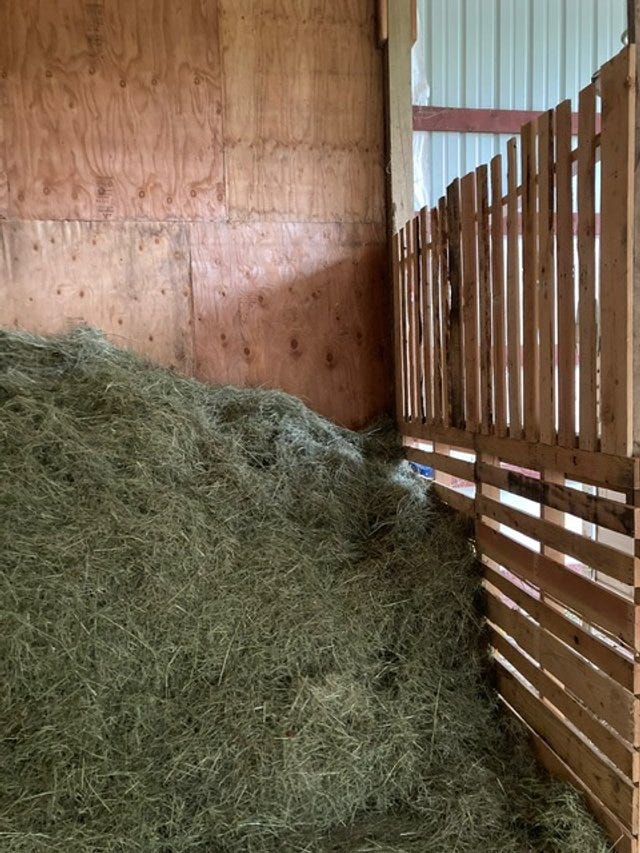
Before you remove your hay from the field, there are a few things to keep in mind for winter storage. If you have a dirt or concrete floor storage area, keep your hay elevated, because bare ground, even in enclosed barns, often has moisture that can ruin hay. The cheapest way to do this is to lay down a single layer of economy tarps then line the floor with pallets. Ask around because some used, but 100% fully intact, pallets can be picked up for free at many farm and feed stores. Pallets will, floods notwithstanding, keep your hay dry and safely away from ground moisture.

One of the limitations with storing loose hay is that it takes up more room than baled hay. If your hay barn has three walls you can stomp compress your loose hay pretty well. The way our hay storage area was arranged, we had to make a third wall from “free” pallets to hold the hay pile in place better. After you pile your hay in your covered storage area, you can watch young ones have fun when you let them jump on the hay to compress it down. Truthfully, it’s kind of fun to do it yourself too. Don’t be deflated when your 8-foot-high pile of hay suddenly turns to a four-foot pile of hay when stomped.
And that’s pretty much it. This method takes more time and more muscle but significantly less money. Have fun foraging. If you don’t have enough land to forage your own hay, think outside the box. There may be someone in your community that has a chemical free and physically harvestable grass field that they will let you “clean up”.
Happy foraging!

To further support quietly wild and my quest to teach the art of homemade living, please consider buying me a coffee or making a purchase at Wild Wisdom Wool. All support is appreciated. Thank you for being here and reading. ❤️